
This is my family and me. :)

I'm super excited to be guest blogging today here at Organizing Made Fun because Becky is SO AWESOME and I'm honored that she wants to be friends with me. We roomed together at Blissdom this past February and had the best time together! She is a gem. Here we are together:

Today I'm going to show you how to make your own chic custom Cloche, but before I begin the tutorial I start by sharing a few HoH projects that have been fan favorites. You may have even seen a few of these around pinterest. Simply click on each picture to see the full tutorial. My most popular post ever is for making Cupcake Cones:

My How to make a super cheap curtain rod post has the 2nd most pageviews on my blog, but the How to make curtains post has the most pins on pinterest.


And finally, another hugely popular post has been a tutorial on painting perfect lines on a wall:

Now that you've gotten to know me a litte better, I want to share with you today how to make your own fancy-smanchy decor balls out of... wait for it... pinto beans!
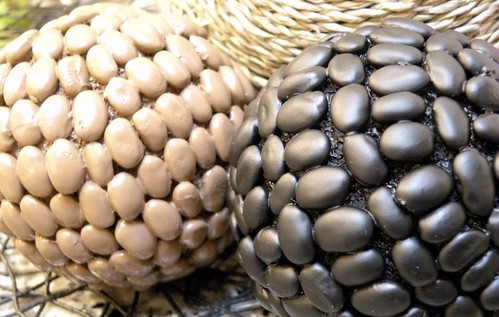
I found the most hideous decor ball at a craft store for a whopping 5 bucks. Check out how ugly it is:
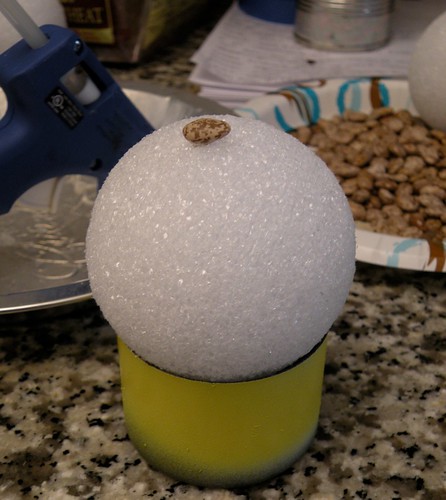
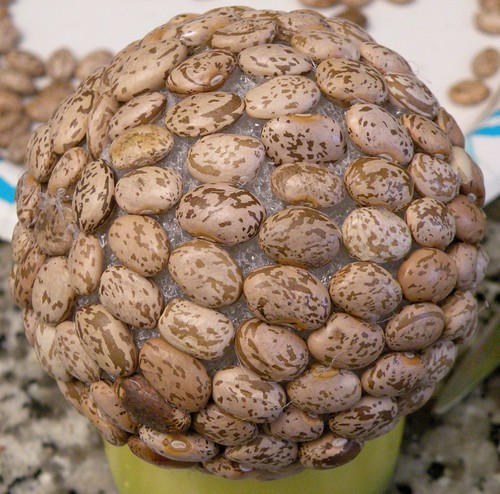
I couldn't believe they wanted five big fat bucks for that thing. I knew I could make a decor ball about fifty bagillion times more awesome for a fraction of the price. Here's how I created my very own pinto bean decor balls: I purchased a few foam balls and a bag of pinto beans. Then I started hot gluing the beans to the ball, paying special attention to the pattern I was laying them out in.
I worked my way around the ball gluing row after row of beans.

TIP: a washed out tunafish can works great for holding the balls in place as you glue your beans on! Eventually I finished
all my gluing.
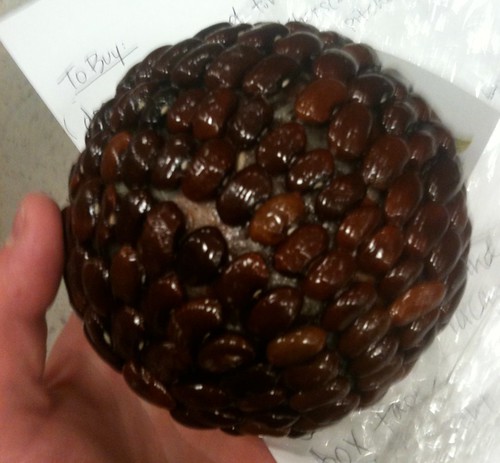
Then I made a 2nd decor ball with a different pattern on it. From there all you need to do is prime them with spray paint primer, then give them both a good coat of spray paint in a satin finish.
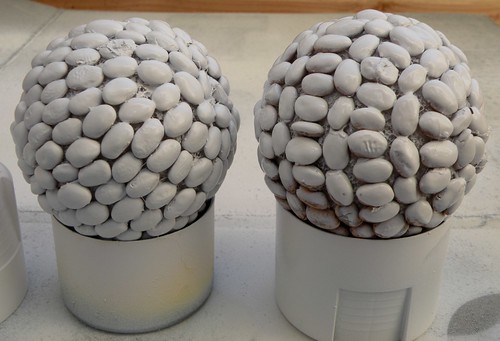
{Primed but not painted}
And that, my friends, is all there is to it!
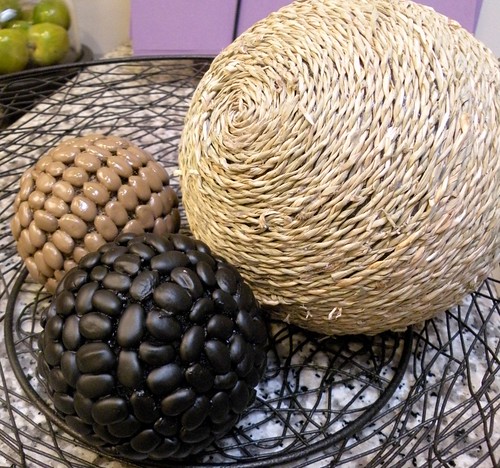
Now you have yourself some super chic decor balls!
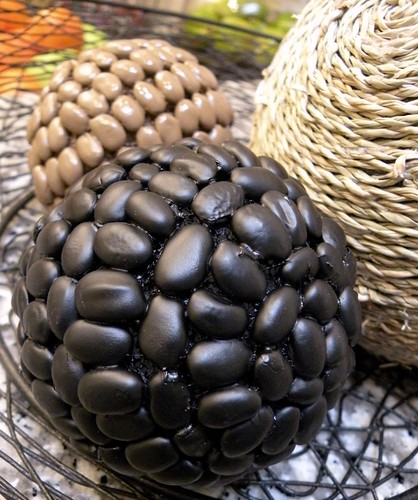
I hope I've inspired you today! Please feel free to stop on by my house online, House of Hepworths, for even more crafty tutorials! Becky, you are the bomb-diggity-dawg. Thanks for letting me play with your friends today. (Pinto Bean decor ball post originally published here. Large decor ball post originally published here.)

I adore Allison. She is like a younger sister to me...and we just hit it off so great together at Blissdom. She says some really sweet things about me...the feelings are mutual! Make sure you stop by and tell I sent you. She's got such a fun blog to read. You will really get a kick out of how she takes DIY to a whole new level of fun! And, she's going to teach you how to do things you didn't know you could do!
If you want to follow my adventures in Florida, you can follow me on my Instagram or Twitter...where I'll be sharing my photos from my travels abroad!

Like what you see here? Consider becoming a follower or subscribe via email!
Having trouble seeing the pictures? Try THIS.
Are you an Organized Reader? I'd love to see your organized space. Email me HERE and show me your space to possibly be featured as one of my Organized Readers.